CONTAINERIZATION SETUP AND FLOW STEPS IN ORACLE APPS R12
SETUP STEPS:-
Step 1: Navigate to the Item Types window
Navigation : Inventory--> Setup--> Items-->Item Types

Step 2: Navigate to the Container Types window
Navigation: Inventory --> Setup --> Items --> Container Types

Step 3: Create a Container Item
Navigate to the Master Item window
Navigation: Inventory --> Items --> Master Items

Step 4: The Physical Attributes for Items are defined to Include in Containers (Load Items)
Navigate to the Master Item window
Navigation: Inventory --> Items --> Master Items

Step 5: Container-Load Relationships for Containers and Items are defined.
Navigate to the Container-Item Relationships window
Navigation: Order Management > Shipping > Setup > Container Load Details

FLOW STEPS:-
Step 1: Create Sales Order

Step 2: Enter the item in the sales order which will be packed after picking from the sub inventory.

Step 3: Pick the sales order line quantity .

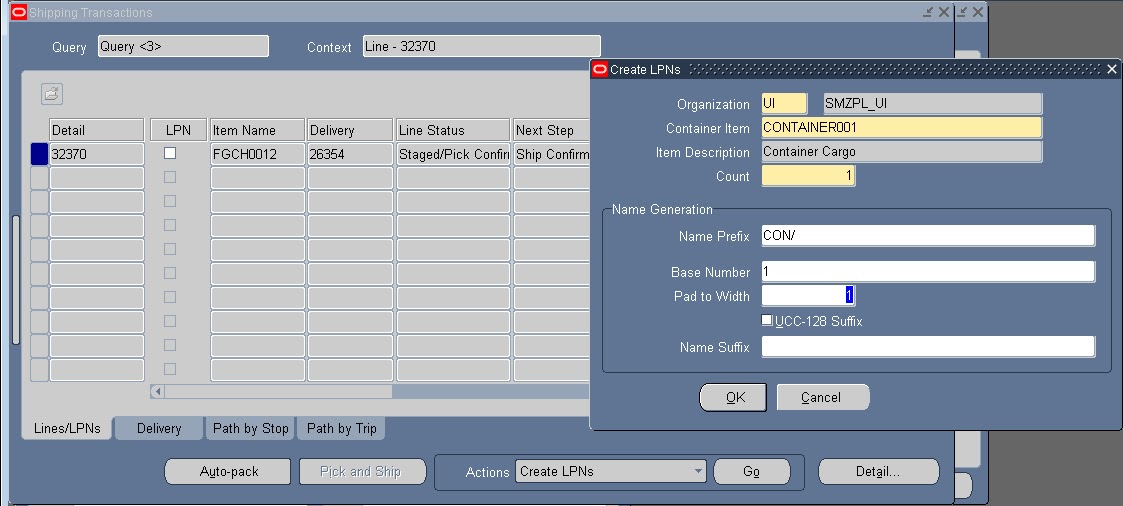
Step 4: Select the Create LPN Line from the Actions and select the container from the LOV and set the prefix for the Container line.
Step 5: Select Packing Workbench from the Actions and click on Go , the LPN item with the container details are displayed.

Step 6: Select both the container and item line and then click on ship confirm .
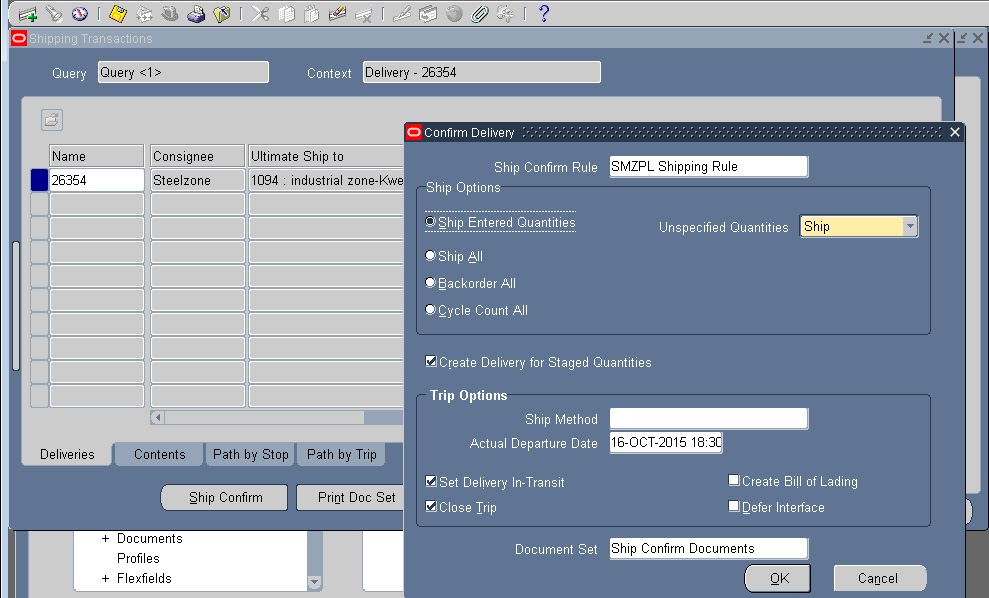
Step 7: After the Delivery search the record with the delivery id and check the status both are shipped and sales order line is interfaced.

No comments:
Post a Comment